New Segment
In this topic we describe how to create segments for your CDP.
The terms and conditions can be found here.
You can manage the segments available to you when you are on your CDP.
If there are none, or you need to add some manually, you can follow the steps below.
First of all, on the CDP, find the segments-tab and click to open it:

This leads you to the segments overview page.
If you have permissions to manage segments, you will see a big + button and 2 default segments. Click it to start making a new segment manually.
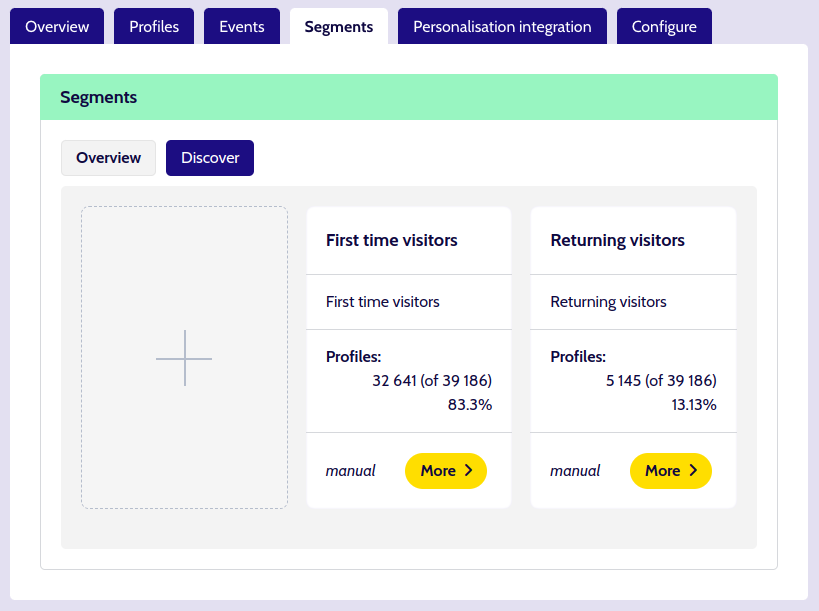
On this overview you can see the following info of a segment from top to bottom:
- Name
- Description
- Profile count
- This shows how many profiles are in this segment, out of the total amount of profiles the CDP has.
- Tags
Info
Do note that upon creating a new segment or updating an existing segment, it can take a while for Unomi to (re)populate the segment. The more profiles your CDP has, the longer this will take.
Step 1: Segment info
With the examples that follow we will build a segment with users who are returning visitors, who have last visited our site during the current month and who are either from Belgium or Germany.
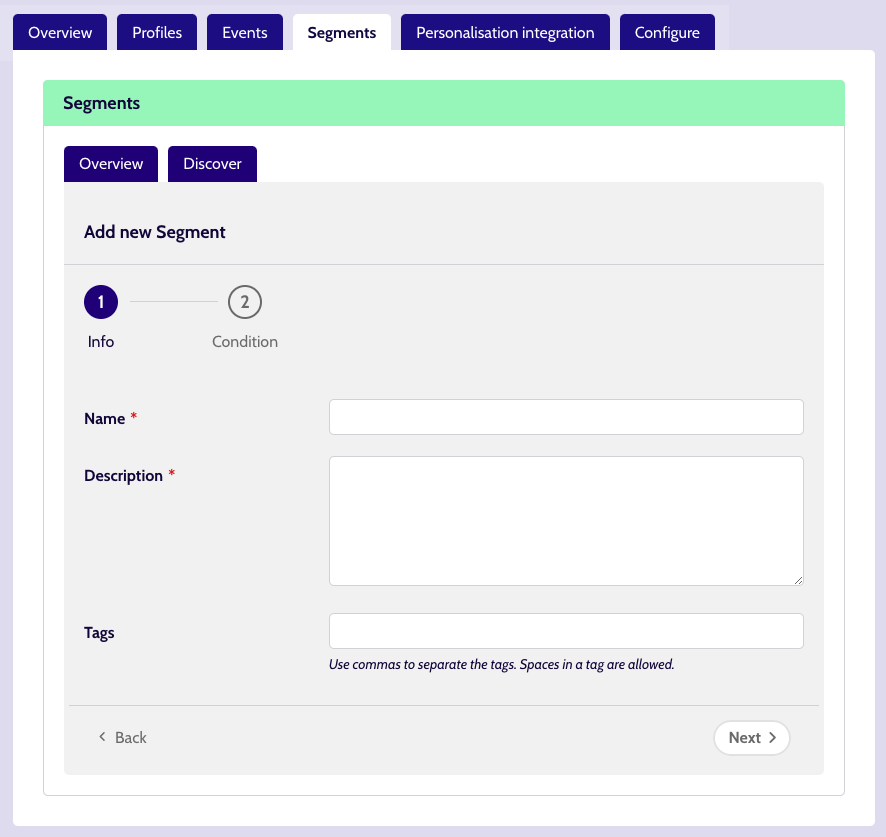
Start by filling in the segment information:
- Name: the title that will appear on the Card, on the segments overview. For our example we pick the name
Returning visitors from Belgium or Germany. - Description: a short description to give some information or context about the segment. Appears on the card.
- Tags: extra meta information, can be used to filter segments.
There is also a property called 'System tags', which is not editable and automatically applied to Segments you create.
This is to differentiate segments made in the Platform (automatically tagged manual) from Segments created elsewhere via the Unomi API.
Step 2: Segment rules
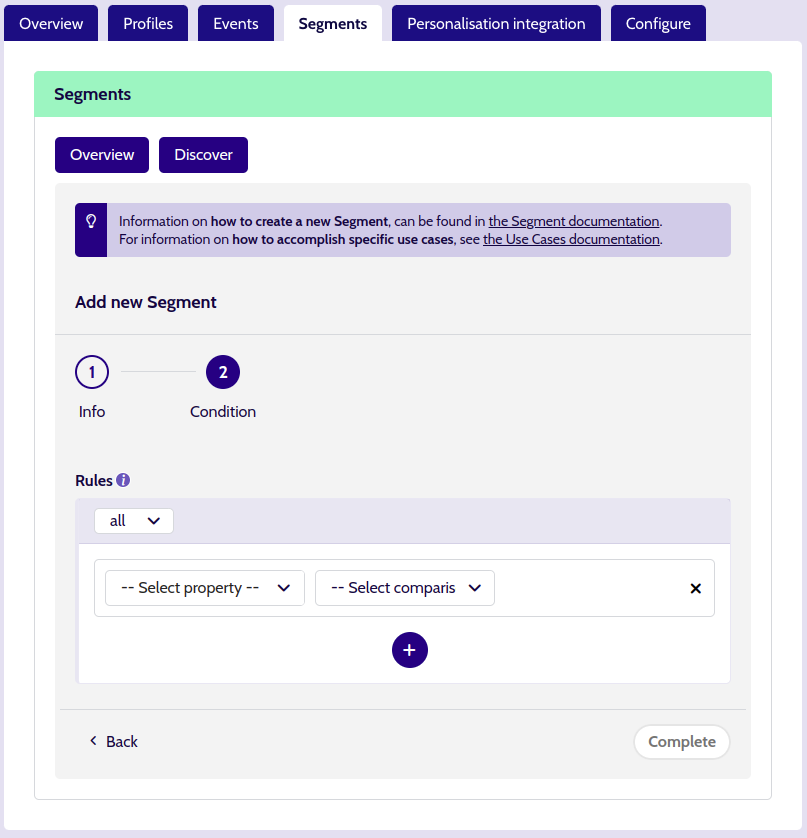
Here we decide what criteria must be used to build a segment.
We can combine Rules to create as simple or complex a group as we want.
We can nest these groups, also indicating if all the rules in a group must be met or if any will do.
And we can of course, combine Rules and groups of Rules.
Tip
You will occasionally find an info icon next to a label or Rule. Clicking it opens a modal dialog with some extra information and/or a link to these support pages.
Setting a group operator
All segments start with 1 main group. You can start by changing (or leaving) the operator (located in the header of the group). The default value is all (so all the Rules inside the group must be met).
all uses the and operator behind the scenes, any uses the or operator.

Adding and editing a Rule
There are 2 types of rules:
- Rule with a property
- These rules are based on properties present in the user's Unomi profile.
- Rule with a segment
- These rules are based on the segments the user's Unomi profile belong to. This can be used to create subsegments of existing segment. This way you don't have to fully copy all the rules you have set in the main segment.
Rule with a property
At the very start of a new group, an empty Rule with a property is already included, so you just need to change the Property, the Comparison and (depending on those) a Value.
Info
If you don't want this Rule with a property you can just delete it with the x on the right of the rule and add a new rule with the blue + button.

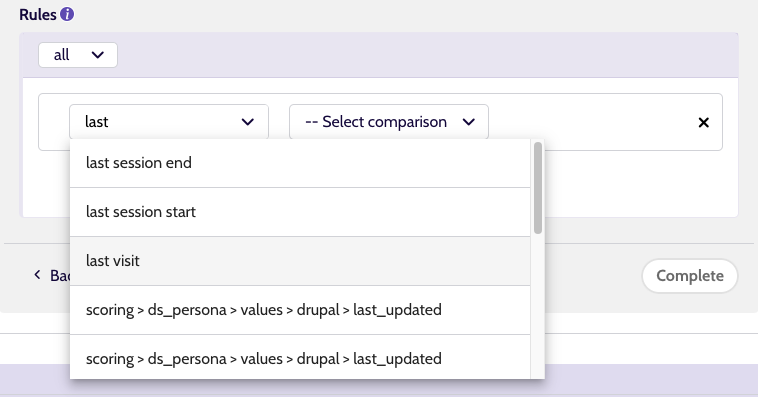
- Property: this autocomplete / dropdown field, lists the properties that are being logged by the data capture script that is added to the website (or web app) connected to this CDP.
So if we search for last visit, for example, we can build a rule based on visitors last visits.

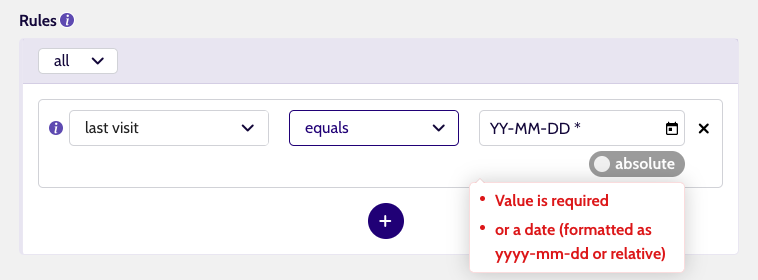
- Comparison: You will see this marked as
requirednow. There are a lot of options here. If I wanted to base my segment on an exact date or period when the last visit occured, would use equals. If I wanted to base my segment on visits occuring after a certain date though, I could usegreater than(a date in the future is "bigger" than an older date).

Tip
Picking a Comparison, makes an info-icon (i) appear at the start of the Rule. Clicking it gives you a bit more context and information about the Comparison.
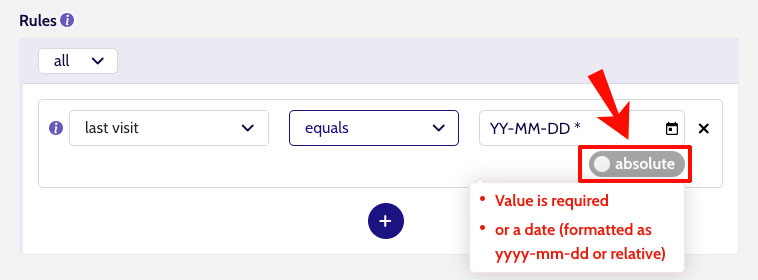
- Value: The type of value will depend on the Property and Comparison. Some require a checkbox, some a number or text and others (like
last visit) requires you to pick a date. In our case, we don't want to use an absolute date (a point in time) but we want a relative date (a point or period in time relative to now). So we click that switch and choose This month in the dropdown.
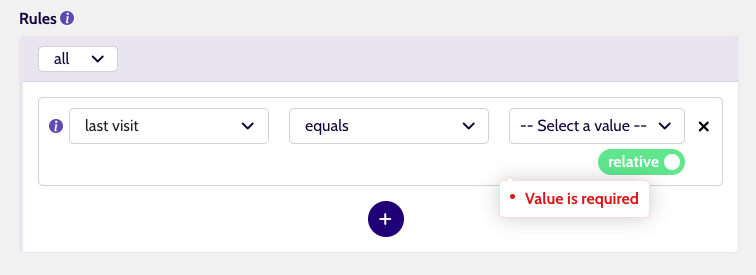
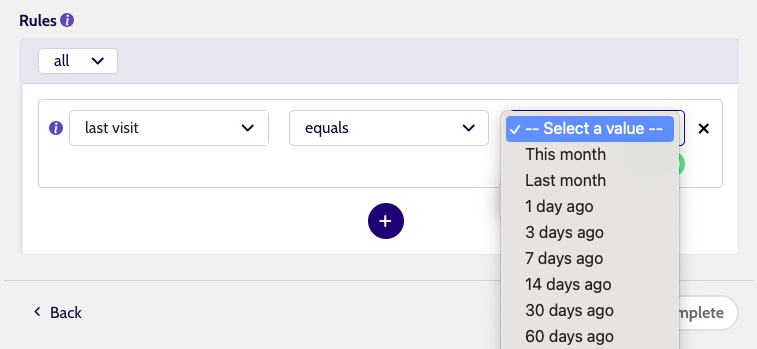
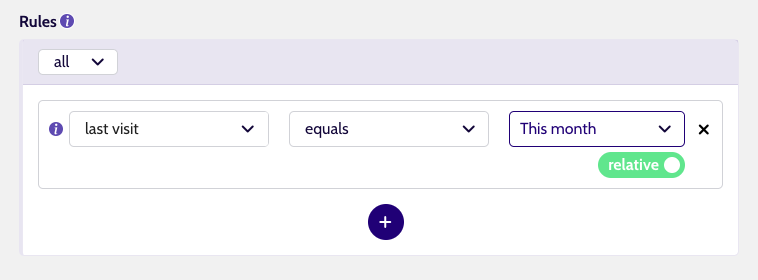
Now we have a segment with only users who have visited our site during the current month.
The next step is to add a rule to only include users who are returning visitors. And since we already have a segment for returning visitors, we will add a Rule with a segment that includes the users who belong to the Returning visitors segment.
Tip
Only some Properties that deal with dates, let you switch between an absolute date (using a date picker) or a relative date (using a dropdown).
For this example, we're switching to a relative date. This has the side effect of resetting the Comparison. This is because there are different Comparisons for absolute vs. relative dates available.
Important
Not all Rules use a Value. It's only once we have picked a Comparison that relies on a value, that we should now see a new field appear.
Rule with a segment
To add a rule with a segment, you have to add a new rule.
You can do this by clicking the blue + button and choosing Rule with a segment.
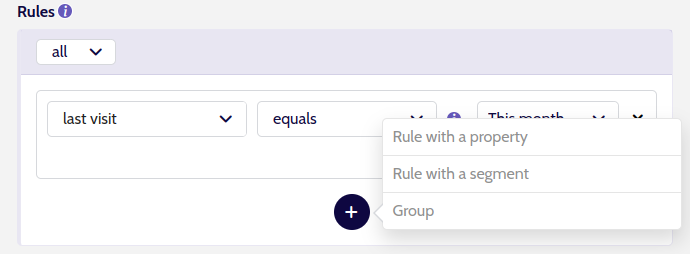
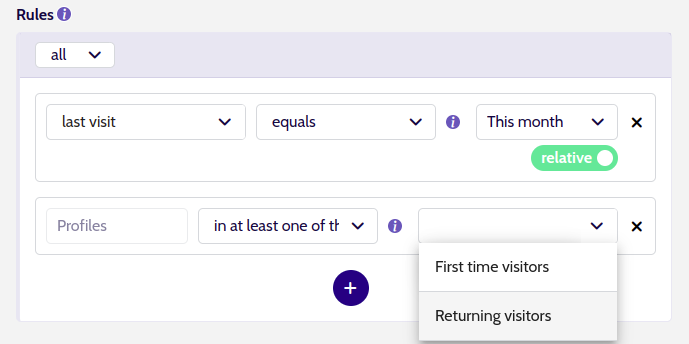
For this rule you have to fill in the Match and the Segments you want to match with.
-
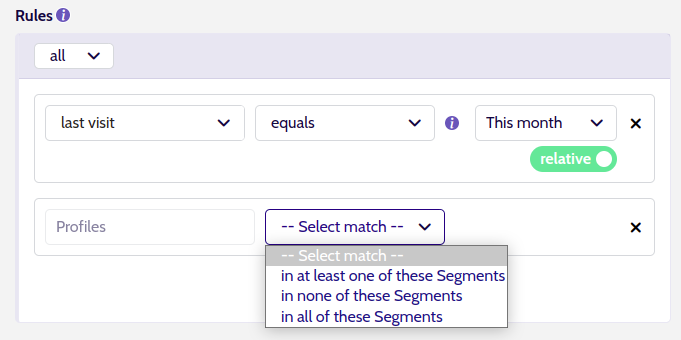
Match: This is a
requiredfield. There are 3 options:- in at least one of these Segments
- in none of these Segments
- in all of these Segments
If I want this segment to be based on at least one other segment, then I choose
in at least one of these Segments.
- Segments: This is a
requiredfield. Here you can choose which segments your rule has to match with, taking into account the match type you have chosen. You can choose 1 or multiple of your existing segments. If I want the Unomi profiles to be in theReturning visitorssegment, then I choose just theReturning visitorssegment here.
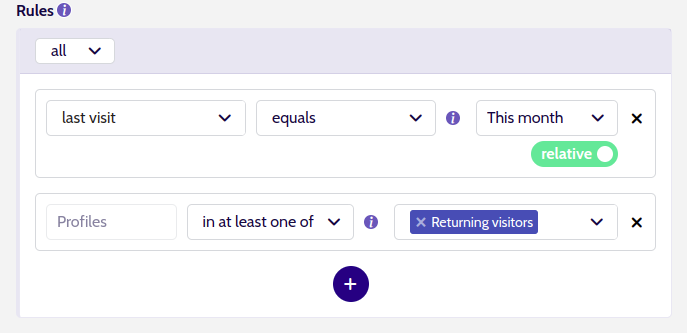
Now we have a segment with only users who have visited our site during the current month and who are returning visitors.
The final step is now to add rules to only include users who are either from Belgium or Germany. We will do this by adding a new group with rules to include users from Belgium OR Germany.
Adding a new Group
Since we use the group operator all it is not possible to now add 2 rules to include either users from Belgium OR Germany.
To do this, we need to add a new Group after our current Rules. This new group will have to contain 2 new Rules, grouped by the any operator (because we need any of the Rules to apply, not all of them).
So start with clicking the blue + button coming after the first Rule and pick Group.
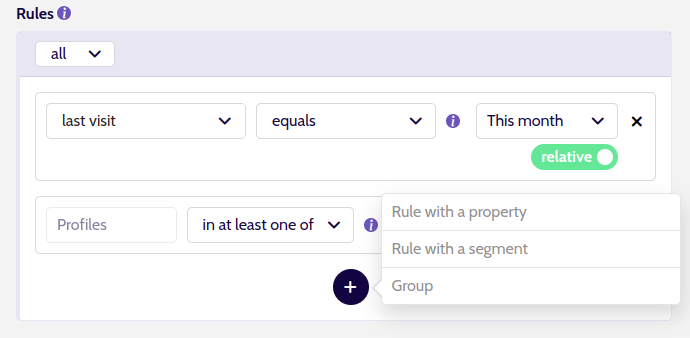
We now have a new (nested) group available and can follow the same steps as before to build up our Rules.
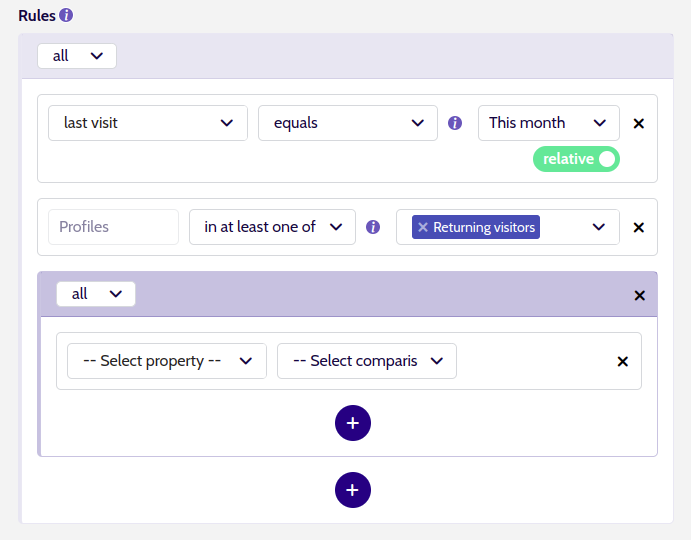
- For the group's Operator, we set the dropdown to any
For our example, we then want 2 Rules with a property, to check the country of the user.
We will not go in depth in the creation of these rules again, for more info check Rule with a property.
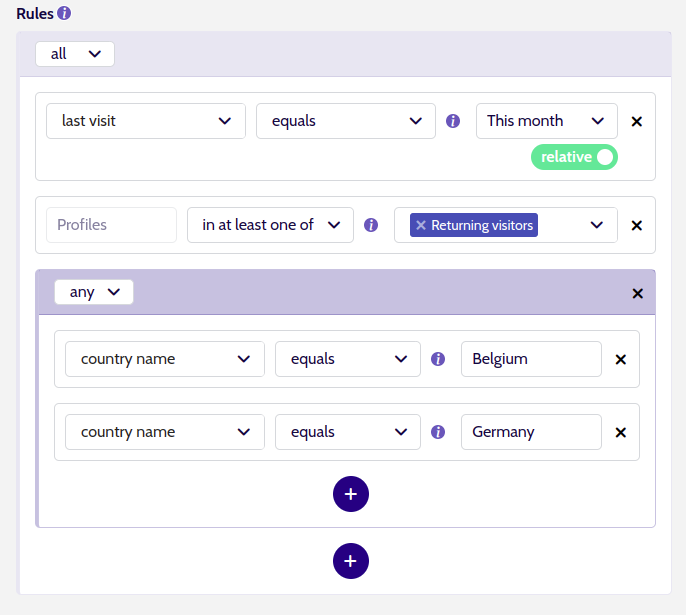
Now we hit Complete and we are (almost) done.
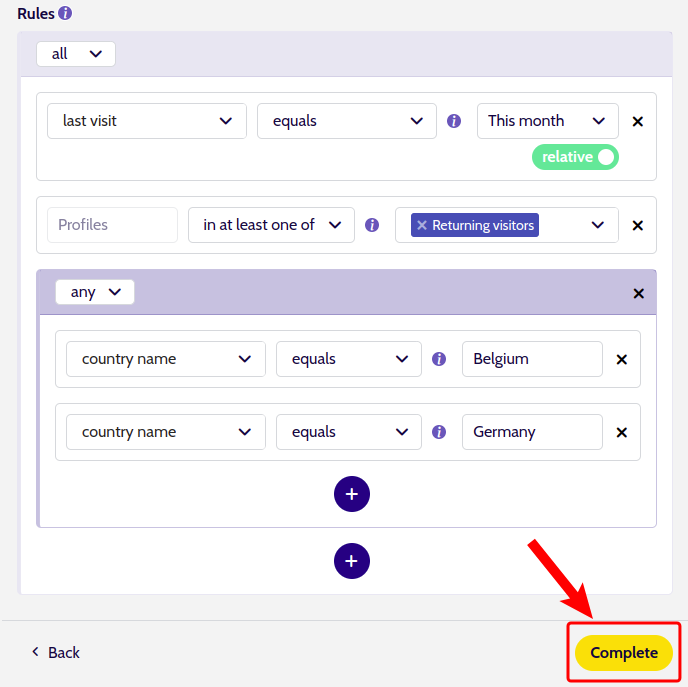
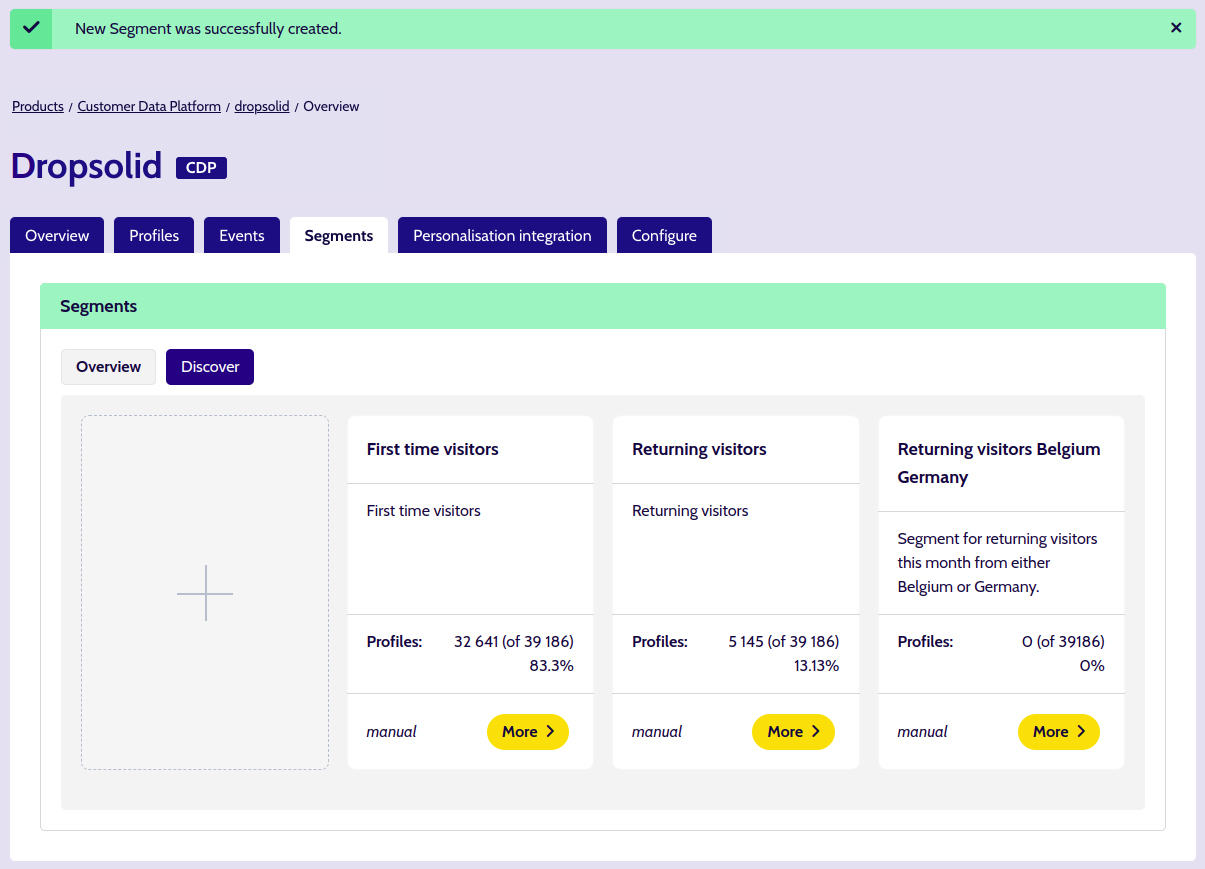
Saving the segment will redirect us to the overview page, with a message that the segment is being created. This can take a few minutes if your CDP handles a lot of profiles.

When the job is done, you should see your new segment in the overview.
